How Do I Get My Business Listed on Siri?
With 50% of all searches made using voice assistants, it's a good idea to register your business for listing in Siri’s search results, using Apple Business Connect. In this article, we show you how.
The total number of voice searches made using virtual assistants such as Siri and Alexa is increasing dramatically year over year.
Currently, 50% of all searches are made by voice, with around 30% made without a screen, using popular smart speaker systems such as the HomePod and HomePod Mini. Apple has stated that Siri handles a staggering 25 billion requests per month.
Wearable devices such as the Apple Watch have also contributed to the global surge in voice search requests.
The tight integration of Siri into all Apple products, plus convenience, accuracy, and feature improvements, means that voice search popularity will continue to grow in the coming years.
How does Siri business search work?
When you ask Siri to find a service, for example, by saying:
Hey Siri, find me an electrician.
Hey Siri, where is my nearest gym?
The virtual assistant does the following:
- Sends the query to Apple's servers for translation.
- Searches through Apple's database of information, such as Apple Maps, and connected third-party services, such as Yelp.
By ensuring your business appears in search results when people use Siri to find your services, you can tap into a growing market of potential customers. To achieve this, you must register with Apple Business Connect , a free tool that allows you to manage your business information across Apple apps and services, including Siri and Maps.
In addition to appearing in Siri search results, registering your business with Apple Business Connect means people can use Apple Maps to get directions to your business location and see your opening times from their devices.
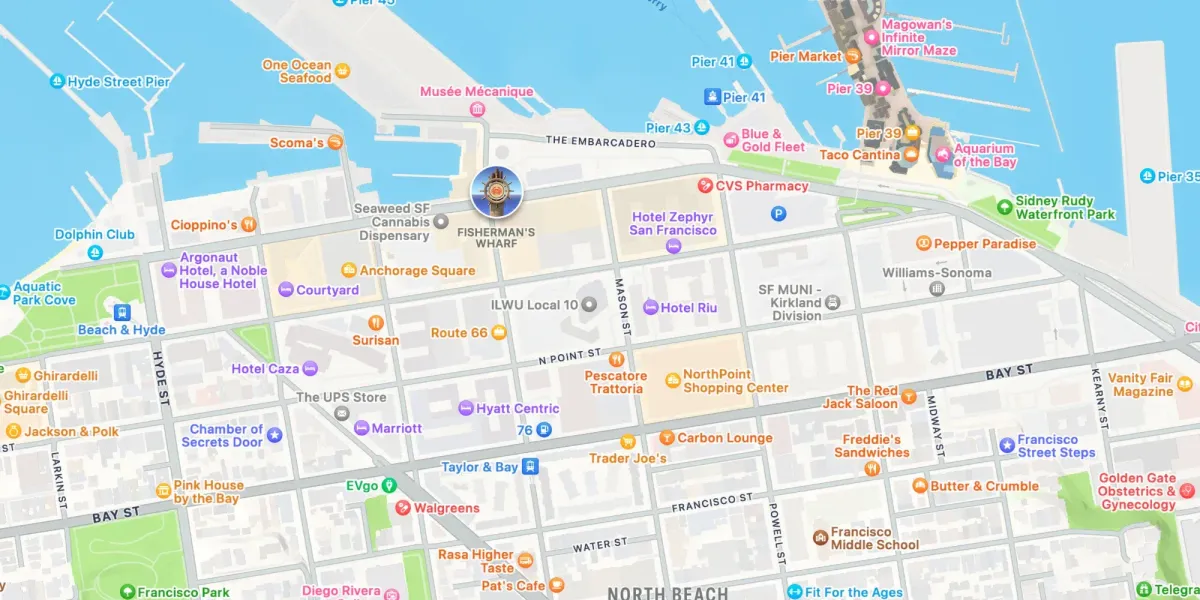
Your business will be represented by small icons that appear in Apple Maps.
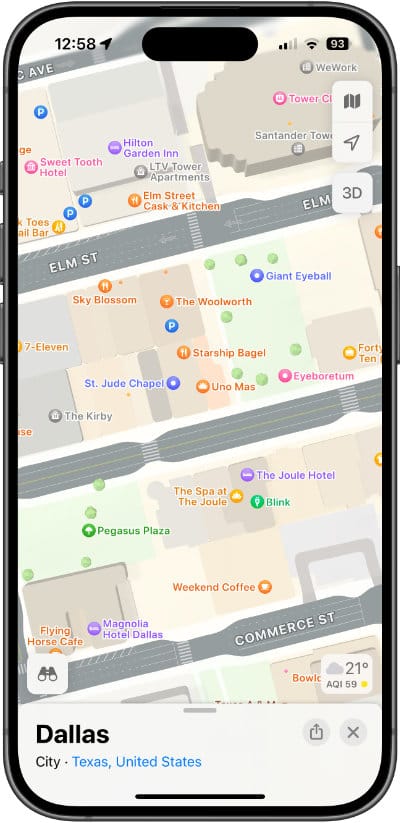
How to find out if your business is already listed in Apple Maps
To check if your business is already listed in Apple Maps:
- Open the Maps app on your device.
- Type the name of your business in the search box.
- If your company appears, then your business is already registered.
If you don't find your business listed in Apple Maps, you must manually add your business using the Business Connect website (previously called Apple Maps Connect).
What is Apple Business Connect?
Apple Business Connect is a powerful, free web-based tool designed to help businesses of all sizes manage, measure, and grow their online presence. With Apple Business Connect, you can easily set up your business to be discovered by customers across various Apple platforms, including Maps, Apple Wallet, and Siri.

One of the key features of Apple Business Connect is the ability to personalize your Place Card. This allows you to bring your business to life by adding engaging text, captivating images, and compelling offers and events using Showcases.
By leveraging these features, you can effectively communicate up-to-date information, share attractive offers, and drive customer engagement through various actions such as ordering food, purchasing tickets, or booking reservations.
In addition to enhancing your online presence, Apple Business Connect provides valuable insights into how your business is being viewed and interacted with on Maps. This data can help you make informed decisions to optimize your business listing and improve customer engagement.
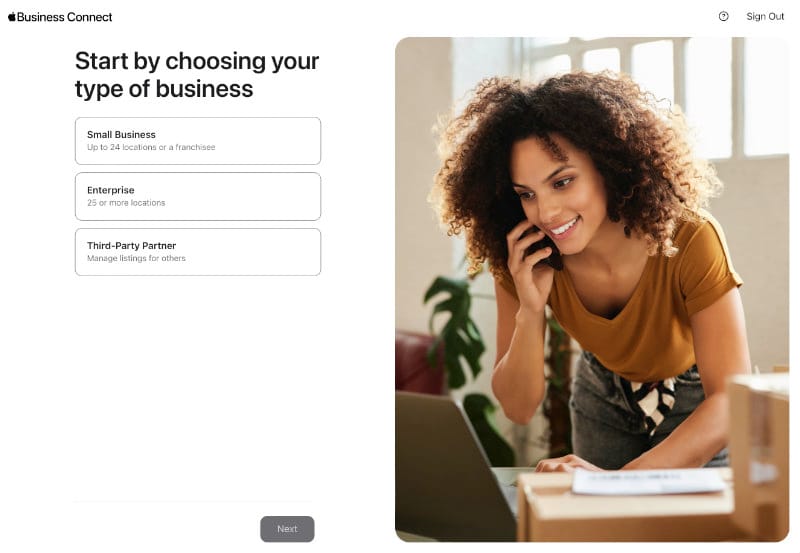
This guide will walk you through the process of creating a Small Business account on Apple Business Connect. As defined by Apple, a Small Business account is suitable for a single business with fewer than 25 locations within the same country.
What do I need to get started using Apple Business Connect?
Before getting started with Apple Business Connect, ensure that you have the following information readily available for your company and each of its locations:
- Business name
- Physical address
- Phone number
- Website URL
- Hours of operation
- Business description
- Category or Industry
- Photos or logos representing your business
- Social media links (if applicable)
- Any special offers, events, or promotions you'd like to showcase
How to create your Small Business account in Apple Business Connect
Before adding any of your businesses, you must first agree to the Apple Business Connect terms and conditions and provide your company information. Here's a step-by-step guide:
- Navigate to Business Connect and sign in to your Apple Account.
- Click on Terms of Use and carefully review the terms and conditions for using Apple Business Connect.
- Once you agree to the terms, click on I agree to the Terms of Use.
- If you'd like to receive updates from Apple Business Connect, select I want to receive Apple emails, then click Let's Go.
- Choose Enterprise and click Next.
- If this is your first time signing in, your Apple Account will be associated with the Administrator role.
- Fill in your company details and agree to the terms and conditions of Apple Business Connect.
- You can also download and print the terms and conditions for your records.
- Finally, search for and add your first business or brand using the provided options below.
Add one of your business locations
Here's a step-by-step guide to searching for and adding an existing location of your business on Apple Business Connect:
- Enter the name of your business location and click Next. If the location doesn't appear in the search results, click Add location with this name.
- If you need to add additional information to your address, such as a suite number, click Add Line and enter the necessary details.
- If the location you entered is already claimed by another company, you'll see a message that says, This location is already managed. In this case, you have two options:
1. Continue the process. When you reach Step 5: Verify a claimed location, you can request a location transfer to your business.2. Click Ask to join the team, complete the request form, and click Send. The current Business Admin of the claimed location will receive your request and can choose to deny it or add you as a team member. If added, you'll be assigned the role of Business Admin or Business Read-Only for specific businesses. You'll receive an email notification regarding the status of your request (denied or approved). - Adjust the map so the pin is directly over your building. You can zoom in or out using the + or - buttons in the lower right corner. To better view your entrance, you can switch to Hybrid or Satellite view by clicking the Map Mode button in the upper right corner.
- If you have the exact latitude and longitude coordinates for your location's entrance, you can enter them directly by clicking Enter Coordinates.
- Review the location, and if the pin is not positioned over the correct building, click Reset.
- Once the pin is accurately placed over the correct building, click Next to proceed.
Add details about this location
Here's how you can add details about your business location on Apple Business Connect:
- Choose the default language for the location and enter the desired name.
- Verify the primary category and make changes if necessary. You can also add an optional secondary category to describe your business better.
- Provide a phone number that customers can use to contact this specific location.
- If your business has a general website or if this particular location has a dedicated web page, enter the URL and click Next to continue.
Add your hours of operations
Here's how to add your business's hours of operation on Apple Business Connect:
- Choose the days of the week your business is open and specify the opening and closing times for each day.
- If your business has different hours on certain days, you can provide more detail. For example, if you have extended hours on weekends or reduced hours on holidays, make sure to include this information.
- Once you've entered all the necessary information about your business's operating hours, click Next to proceed.
Add your company details
Here's a step-by-step guide on how to add your company details to Apple Business Connect:
- Enter your company's legal name, followed by your address and contact information. (This information may differ from the details you provided for your initial location).
- If applicable, add your company website and DUNS number (Data Universal Numbering System, a unique nine-digit identifier for businesses).
- Carefully read through the Apple Business Connect Terms of Use.
- If you agree to the terms, check the box next to the statement, I have the legal authority to agree on behalf of the Business and confirm that the Business agrees to the Terms of Service.
- Click Next to proceed.
Once you've completed these steps, you'll need to perform one of the following three tasks, depending on the status of your location:
- Verify a new location.
- Verify an existing location.
- Verify a claimed location.
Verify a new location
You can request verification from Apple immediately or at a later time. However, no public information about your location will be displayed until your business is verified, a process that can take up to 5 business days.
Choose one of the following options:
- If you don't want Apple to verify your business right now, click Skip.
- To have Apple review and verify that you own or manage the business, click Upload document. Then, upload an official document that clearly displays the location's name and address, such as a lease agreement, insurance policy, or utility bill.
Click Send to submit your verification request.
Verify an existing location
You can choose to request verification from Apple immediately or at a later time. Keep in mind that no public information about your location will be visible until your business is verified, which can take up to 5 business days.
Select one of the following options:
- To have Apple review and verify that you own or manage the business, click Upload document. Then, upload an official document that clearly displays the location's name and address, such as a lease agreement or insurance policy.
- Alternatively, you can request a phone call to the existing location's phone number for verification purposes.
Click Send to submit your verification request.
Once your business is successfully verified, you'll gain access to additional features, such as uploading photos, creating your Place Card, adding a Showcase, and more, to enhance your business's presence on Apple platforms.
Verify a claimed location
If a location is already managed by another business on Apple Business Connect, you can request a transfer of ownership. This process can take up to 5 business days. Here's how to do it:
- Provide an explanation for your transfer request and upload official documentation that clearly shows your business name and the exact same address as the claimed location.
- Click Send to submit your transfer request.
If Apple approves your request, emails will be sent to both the administrator of the business requesting the transfer and the administrator of the current business, notifying them of the change in ownership.
What to do next
Once Apple has verified your business, you'll have access to a range of additional options that allow you to enhance your business's presence on Apple platforms. These include:
- Uploading photos to showcase your business
- Creating promotional content to highlight special offers, events, or updates
- Adding call-to-action buttons to encourage customer engagement and drive conversions
By leveraging these features, you can effectively manage your business's online presence and attract more customers through Apple's ecosystem.


