How to Use Siri and HomeKit to Control Your Smart Home
Apple’s HomeKit is at the forefront of the smart home revolution, but what is HomeKit, and how does it work?
Smart living is one of the most exciting new technological developments to enter our homes in recent years, and Apple's solution to controlling devices – HomeKit – is leading the way.
What is Apple HomeKit?
Apple HomeKit is a framework that allows smart devices to work with the Home app on your iPhone, iPad, Apple Watch, and Apple TV.
By using the Home app or speaking instructions to Siri, you can control and automate an enormous selection of smart devices.
What types of accessories work with HomeKit?
HomeKit works with compatible lights, switches, outlets, thermostats, window blinds, fans, air conditioners, humidifiers, air purifiers, sensors, locks, cameras, doorbells, garage doors, sprinklers, speakers, routers, and televisions.
Does HomeKit cost money?
HomeKit uses your home Wi-Fi network to communicate between devices; you don’t need to purchase any extra equipment apart from the smart accessories you want to use around your home.
Before buying third-party accessories, ensure they are fully compatible. Some may require you to purchase a “hub” or “bridge” to connect your devices to HomeKit.

How does HomeKit work?
Apple’s smart home setup has two parts: the Home app, which is used as a central hub to control and automate all your smart devices in one place, and the devices themselves, sold by third-party manufacturers like Eve and Phillips.
Do I need to buy a HomeKit hub?
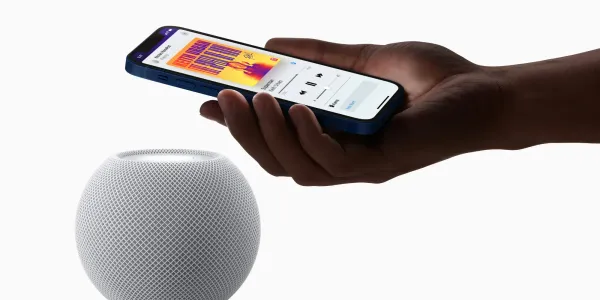
An Apple TV, HomePod, or HomePod mini is required to serve as a home hub and will allow you to control your smart devices when away from home.
Does HomeKit work without the internet?
HomeKit can work without an internet connection. However, you will not be able to access your smart devices remotely.
Does HomeKit use Wi-Fi or Bluetooth?
HomeKit devices connect to your HomeKit setup through Bluetooth, Wi-Fi (or a third-party hub that connects to Wi-Fi), or Thread.
Bluetooth
Some devices connect to HomeKit over Bluetooth. The connection range can be somewhat limited, so you’ll probably need a third-party home hub or bridge to extend the signal.
Wi-Fi
Most HomeKit devices use Wi-Fi or connect to a hub or bridge over Wi-Fi.
Thread
An increasing number of devices now support the newer Thread protocol. Thread-enabled devices create a mesh network that connects all your devices without requiring Wi-Fi, Bluetooth, or hubs to extend the signal.
Thread should improve the connectivity and range of your devices and remove the need to buy additional hubs. Simplifying your smart home setup and reducing cost.
Both the HomePod mini and Apple TV 4k support Thread by default.
How to set up HomeKit on Apple devices
Apple has made it easy to get HomeKit up and running with minimal technical knowledge, and adding additional devices is a breeze.
The first order of business is to make sure you have a HomeKit hub. This is something that stays permanently in your home. It can be a HomePod or an Apple TV that connects to the network and acts as the base for all your smart devices. It will allow you to control your accessories while away from home.
HomePod
If you have HomePods in your home, they’ll automatically become home hubs.
Apple TV
An Apple TV automatically becomes a home hub when added to HomeKit. On your Apple TV:
- Open Settings > Users and Accounts.
- Check that your name is selected under Default User and that you’re signed in to iCloud with the same Apple Account you used in the Home app.
- Return to Settings, then select AirPlay and HomeKit.
- Scroll down and select Room, then choose a room or add a new room.
How to add HomeKit accessories using the Home app
Some products require the use of their own app and hub or bridge to add devices, so always check their compatibility with HomeKit before you buy.
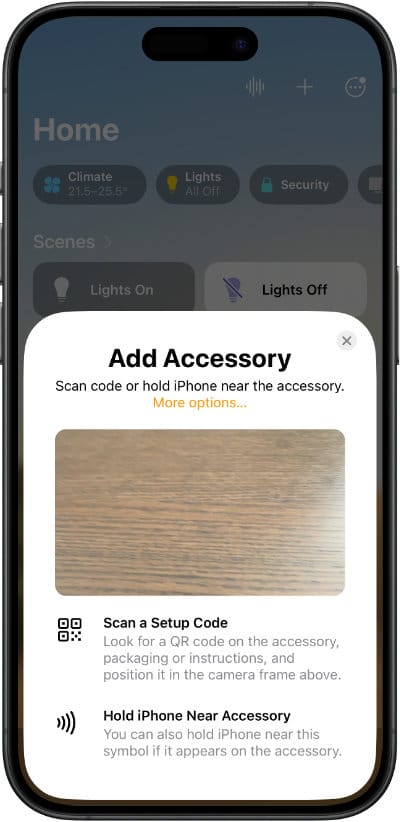
For accessories that are HomeKit compatible, the process is a simple case of scanning a QR code:
- Open the Home app on your iPhone.
- Tap on the “+” symbol at the top of the screen.
- Tap on Add Accessory.
- Scan the QR code on your new device.
- When your accessory appears, tap it.
- If you are asked to Add Accessory to Network, tap Allow.
- Add your accessory to a room and name it. The name will be used to control the device with Siri.
- Tap Continue, then Done.
How to create Rooms and Zones to organize your accessories
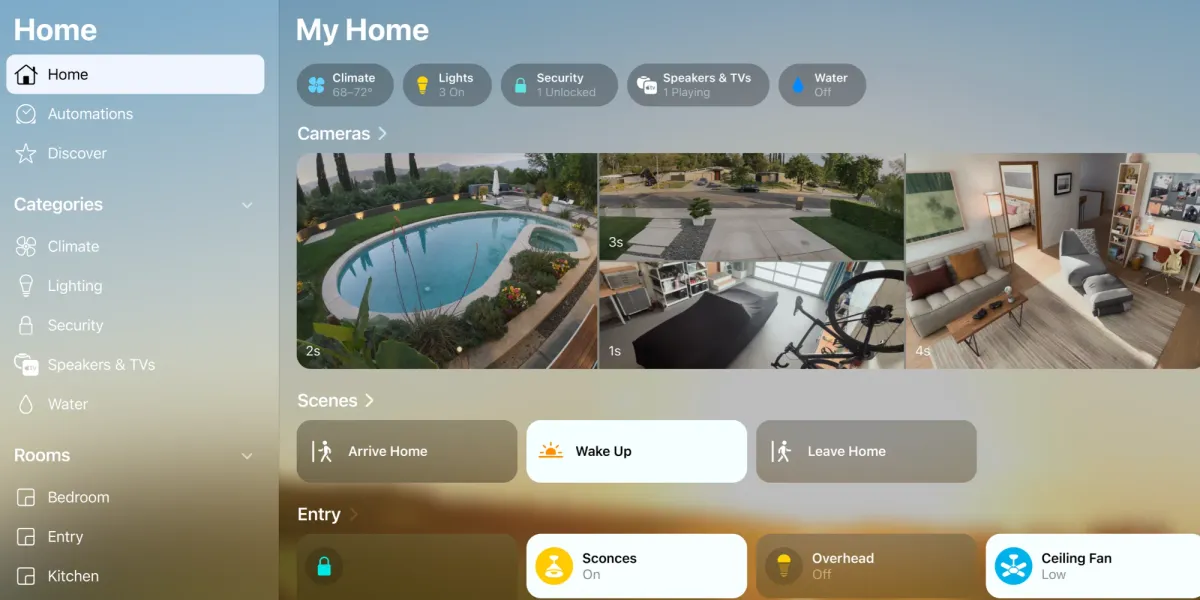
Assigning your HomeKit devices to Rooms and Zones means you can keep them visually organized in the Home app and control multiple accessories at once using Siri.
Rooms lets you group smart devices by room in your home, such as the kitchen or bedroom.
Zones are a way to group rooms together. Like “upstairs,” “downstairs,” or “outside.”
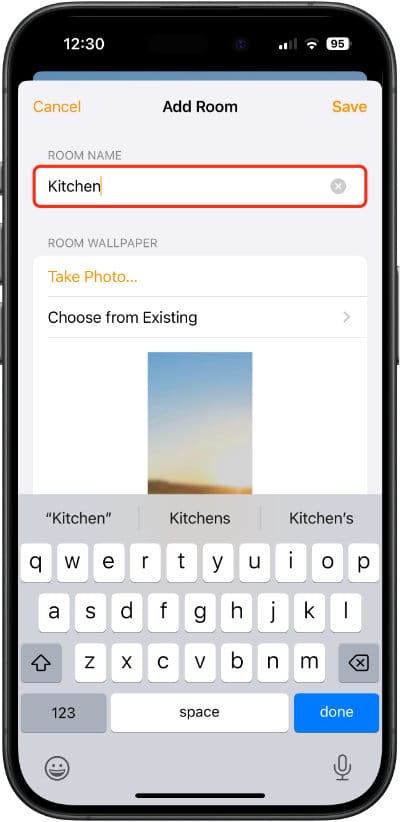
To add Room:
- Open the Home app and tap on the “+” symbol at the top of the screen.
- Choose Add Room.
- Type in the room name, then tap or click Save.
To assign existing accessories to a room
- On an iPhone or iPad, open the Home app, press and hold the accessory, then tap Accessory Details. On Mac, click on the accessory.
- Scroll down and tap, or on a Mac, click Room.
- Select a room, tap or click Close to save.
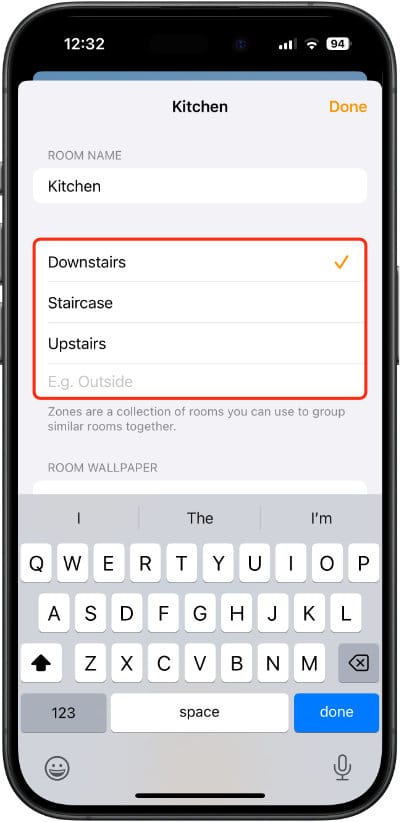
To add Rooms to a Zone
- On your iPhone or iPad, tap the room name to open the room. On Mac, click the room name.
- Tap or click the ellipsis (three small dots in a circle) to open settings, and select Room Settings.
- Tap or click Zone. Select a suggested zone, or choose Create New and give your new zone a name.
- Tap or click Done.
How to control HomeKit devices using Siri
Control individual smart devices by saying the name you gave them:
Siri, turn on the fan.
Siri, turn off the TV.
Some devices, like thermostats, can also offer feedback through Siri.
Siri, how warm is it in the bedroom?
You can also control your devices with Siri using Rooms, Zones, Scenes, and Automation.
Rooms
Siri will recognize the name of any room to which you have assigned accessories. You can use this to control multiple devices at once. For example:
Siri, turn on the lights in the lounge.
Zones
As we discussed earlier, Zones are essentially a group of rooms. Zones allow you to control whole areas of your home simultaneously.
Siri, turn off the lights upstairs.
Scenes
Scenes let you trigger several devices simultaneously at the touch of a button or a Siri command.
For example, a “watching a movie” scene could turn all the lights down, readjust the thermostat, close the blinds, and turn off the porch lights. Say:
Siri, switch to the “watching a movie” scene.
…and all your devices will switch to that scene's settings.
Automation
An Automation lets you automate the behavior of multiple devices dependent on factors like your location, the location of someone you have invited to control your home, the time of day, temperature, or whether a sensor or alarm goes off.
For example, you could create an automation to trigger an “arrive home” scene.
When you issue a voice command to open your garage door from your car between 5 p.m. and 9 p.m., this will activate an automation that will set the indoor lights to 50% brightness, turn the thermostat on, set your HomePod to play uplifting music and unlock the front door, all without touching a button.
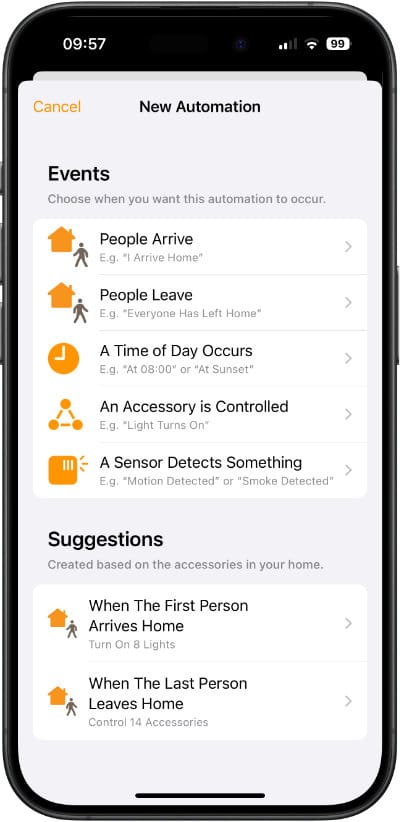
To create a new Automation:
- Tap on Automation at the bottom of the Home app screen on an iPhone or in the sidebar of the Home app on a Mac.
- Tap on the “+” at the top right of the screen and select Add Automation.
- Select the event you want to trigger the automation, the accessories you would like to use, and the criteria to control them.
- Type in a name for the automation.
Automations also allow you to create “smart device chain reactions,” so you don't need to issue multiple consecutive voice commands.
For example, the Eve's Room Indoor Air Quality Monitor lets you remotely monitor your home’s humidity, temperature, and air quality. If you choose, it can automatically turn on your air conditioning, dehumidifier, or air purifier if the air quality falls below a certain level.
How to give other people access to your HomeKit devices
If you share your home with others, sharing access to your HomeKit devices makes sense, too. The only requirement is that they have an iCloud account and a compatible Apple device.
To add people to your Home
- Open the Home app on your iPhone or iPad.
- Tap on the “+” icon at the top of the screen and select Add People.
- Search for the person’s name, then tap to select it when it appears in the search results.
- Tap Send Invite.
The person will receive a notification prompting them to accept the invite. Once they have accepted the invite, they’ll be added to the People list in the Home app.
- Open the Home app on your iPhone or iPad.
- Tap the ellipsis (three small dots in a circle) at the top right of the screen to open settings.
- Tap Home Settings in the dropdown list.
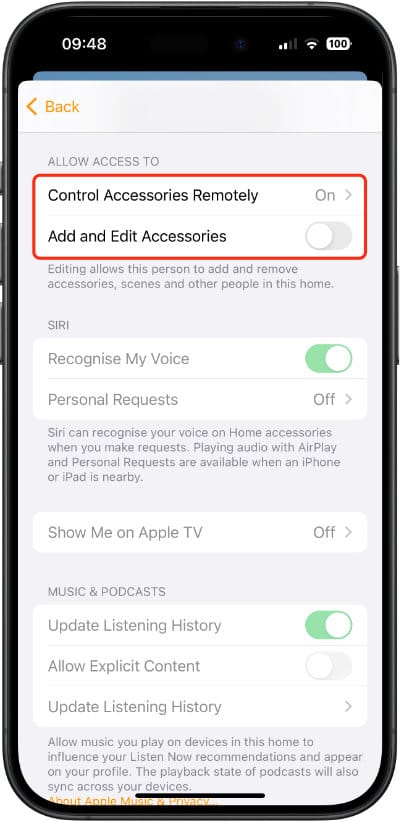
The people who have accepted your invite will be shown in the top section. Tap on their name for further options.
Toggle on Control Accessories Remotely if you want them to be able to control your devices when they are not at home.
Toggle on Add and Edit Accessories if you are happy for them to be able to add, edit, and remove devices from your Home.
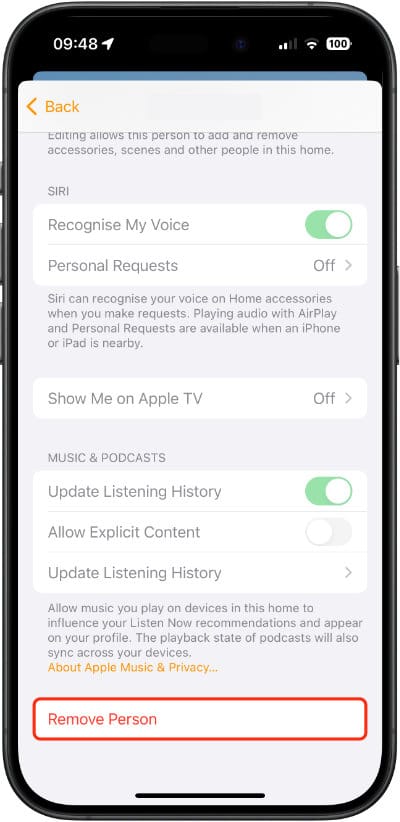
To revoke access to your Home
- Open the Home app on your iPhone or iPad.
- Tap the ellipsis (three small dots in a circle) at the top right of the screen to open settings.
- Tap Home Settings in the dropdown list.
- Under People, tap the name of the person you want to remove.
- Scroll down and tap on Remove Person.
Is HomeKit secure? Can it be hacked?
HomeKit can strengthen your home security more affordably than traditional systems such as CCTV and burglar alarms.
The Home app integrates with smart security cameras to detect threats by analyzing if movement seen on the cameras is people, pets, or cars. If the cameras detect a person standing on your doorstep, the app sends you a notification and a short clip, viewable from the iPhone lock screen.
But is the HomeKit system itself secure?
Every product made for Apple HomeKit must follow Apple’s strict security guidelines to ensure it is safe from hackers.
This is especially important in the modern world, where many devices in our smart homes can watch us and listen to what we say.
Manufacturers must obtain a HomeKit certification with software-based authentication before they are approved for sale by Apple. All HomeKit products use end-to-end encryption, non-reusable encryption keys, and two-way authentication when connecting to a HomeKit setup.
Where are HomeKit videos stored?
Apple lets you securely store all security footage in your iCloud account for free – it doesn't count toward your storage limit.
All data stored by HomeKit on your devices is fully encrypted, and syncing between devices is done using iCloud and the iCloud Keychain.
Make HomeKit as simple or complex as you want
Many HomeKit users have built impressively complex smart homes. Several YouTubers have entire channels dedicated to smart living, and some of their setups are mind-boggling.
But you don't have to set up anything too complicated if you don't want to. For example, you might want to set the app to turn off all the lights when you leave the house, saving some money on your electricity bills! There are no hard and fast rules about what a smart home has to include.
One of the biggest draws to Apple's HomeKit is its flexibility; users can easily add and remove smart devices without requiring technical assistance other than maybe a five-minute online tutorial.
Apple has deliberately designed the Home app and HomeKit to be easy to set up and use regardless of technical knowledge, setting it apart from its competitors.