How to Use Siri with HomeKit and Ikea TRÅDFRI
Learn how to connect your Ikea TRÅDFRI smart home devices with Apple HomeKit for seamless control and automation.

Smart home technology is increasing in popularity, with more people using their phones and tablets to control lighting, heating, and appliances around the home.
Unfortunately for many, buying accessories to control can be expensive, with a simple dimmable lightbulb costing over $60.
A less costly way to test the waters of smart home technology is to use the Ikea TRÅDFRI range. It's a relatively simple system compared to the higher-end products available. Crucially, it works with Apple's Home app for HomeKit. This, in turn, allows you to use Siri to control your home appliances at a minimal cost.
In this tutorial, we're going to use Siri to switch on a lamp that's plugged in via an Ikea Wireless Control Outlet by using the command:
Siri, switch on the living room lights.
Here's what you'll need before you begin:
- An Apple TV or HomePod to act as a hub for HomeKit.
- The Apple Home App installed on your iPhone/iPad.
- An Ikea TRÅDFRI Gateway.
- The Ikea Home Smart App installed on your iPhone/iPad.
- An Ikea TRÅDFRI steering device, such as a Remote Control.
- A TRÅDFRI accessory, in this case, a Wireless Control Outlet.
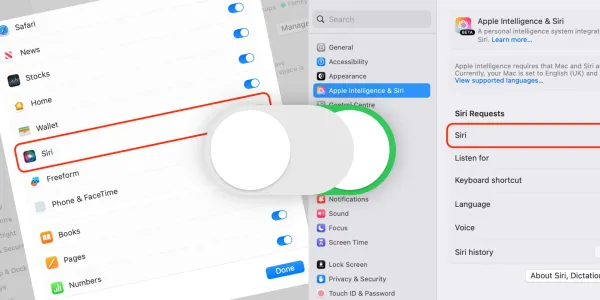
Setting up your Apple Home Hub
For HomeKit to control your devices, you need to have a designated Home Hub connected to the Wi-Fi signal in your home. This would be an Apple TV or HomePod.
Apple TV
- On your Apple TV, go to Settings > Users and Accounts and ensure you're signed in to iCloud with the same Apple Account as your iOS device.
- After signing in to iCloud, your Apple TV automatically becomes a home hub.
- To see if your Apple TV is connected as a home hub, go to Settings on your Apple TV. Go to Users and Accounts > iCloud and look under Home Hub.
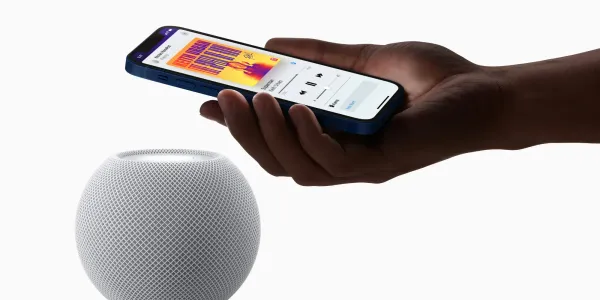
HomePod
HomePod automatically sets itself up as a home hub, so you can control your HomeKit accessories remotely with the Home app and create home automations. Ensure that the iOS device you used to set up HomePod is signed in to iCloud with the Apple Account you used to set up your HomeKit accessories in the Home app.
Setting up the TRÅDFRI Gateway
In true Ikea style, the TRÅDFRI Gateway instruction manual consists of a selection of pictures. Thankfully, the process is relatively easy and involves plugging the device into your router with an Ethernet cable for the internet connection and a USB cable for power.
Once installed, download the Ikea Home Smart app onto your iPhone or iPad.
Pair the Wireless Control Outlet with the Gateway
Depending on your steering device, you will need to follow the instructions supplied. In our case, we're using the remote control.
- Take the back cover off the remote control to see the battery compartment.
- Open the Ikea Home Smart App on your iPhone/iPad.
- Press the plus button to Add Control Device.
- Follow the on-screen instructions on pairing your control device with the Gateway.
- A message confirming you have added your control device should appear.
- Press the small settings icon at the top right of the screen.
- Tap Manage Lighting.
- Press the + button at the bottom of the screen and tap on Control Outlet.
- On the next screen, select the steering device you added a few moments ago – in our case, the remote control.
- Follow the on-screen instructions to pair your outlet.
- Hold the remote control next to the outlet and press the small button beside the battery. The light on the outlet will fade and flash several times. Once it stays as a solid light, release the remote control button.
A message should appear to confirm you have successfully added your outlet.
At this point, you should name your outlet for future reference. Press the three tiny dots next to the outlet name to rename it. This name will be reflected in the Home app.
Add the TRÅDFRI Gateway to HomeKit
- Open the Home app on your iPhone/iPad.
- Tap the Plus + symbol at the top of the screen, and select Add Accessory.
- Use a camera to take a picture of the HomeKit code or QR code on the bottom of the TRÅDFRI Gateway.
- You'll be asked to enter the details about the device, such as which room it is in and the name you want to give it.
- Tap Done when all the information is entered.
Your TRÅDFRI Gateway is connected to your HomeKit system.
Once the Gateway is connected, all your devices should display in the Home app according to the name you gave them in the Ikea Home Smart app.
Use Siri to control the Wireless Control Outlet
Asking Siri to control your lights via the Wireless Control Outlet simply requires referencing it by name in your instruction.
For example, if you called your outlet “Lounge Light,” you can say:
Siri, turn on the Lounge Light.
Siri, switch off the Lounge Light.
In our example, we've used the control outlet to switch a single lamp on and off, but the same method can be used to control any device plugged into a socket.
Using Automation and Scenes for more advanced control
Once your devices are added to the Home app, you can take advantage of features in HomeKit that aren't available in the Ikea Home Smart App.
You can configure all or specific lights to come on or go off at certain times, such as sunset or sunrise.
You can give scenes custom names so that you could say…
Siri, bedtime!
…and your lights will all switch off.